Auto Completion Dummy Package Manual
New in version S22.
Introduction
Warning
Note
Installation
Download and Install any Python version from Python Download which match your needs, it’s recommended to match the Cinema 4D version (see Version) but this is not mandatory.
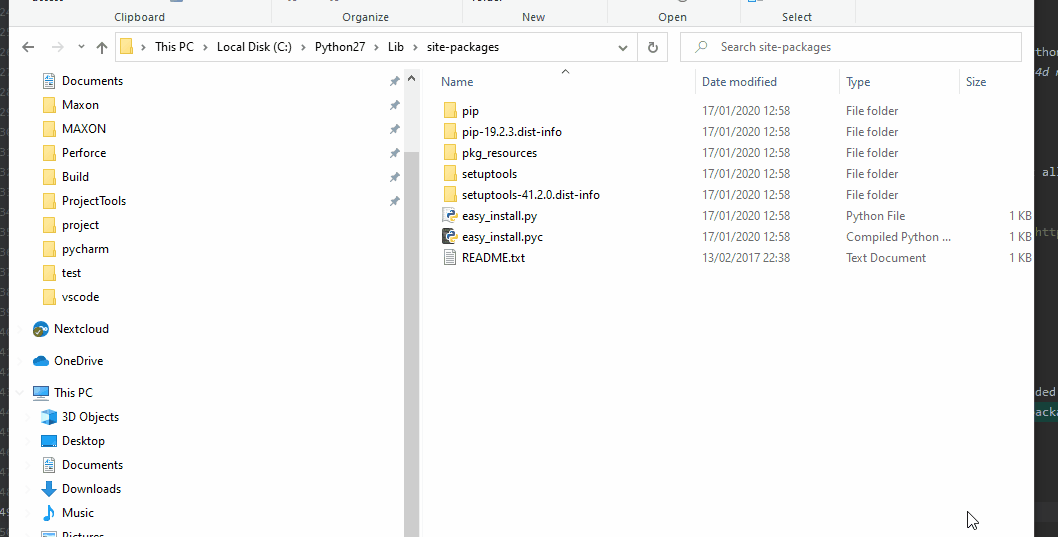
Go to the site package folder, this where to put all 3rd parties Python Package.
Windows:
Go to {Python Installation folder}/Lib/site-packages.
Mac:
Execute ‘/Applications/Python 3.9/IDLE.app’.
Execute the next script to retrieves the Site Package.
import site
print(site.getsitepackages())
Go to the first folder indicated by the previous Python script.
Create a Symbolic Link named c4d pointing to the auto completion dummy package.
Windows:
Open the command line in the site-package folder.
Execute the next command mklink /d /h /j c4d “{PATH_TO_THE_AUTOCOMPLETION_DUMMY_PACKAGE}”
If Cinema 4D is installed in C:\Program Files\Maxon Cinema 4D S24 the complete command to execute will be:mklink /d /h /j c4d “C:\Program Files\Maxon Cinema 4D S24\resource\modules\python\libs\python39\c4d”
Mac:
Open a terminal in this folder.
Execute the next command ln -s “{PATH_TO_THE_AUTOCOMPLETION_DUMMY_PACKAGE}” c4d.
If Cinema 4D is installed in /Applications/Maxon Cinema 4D S24` the complete command to execute will be:ln -s “/Applications/Maxon Cinema 4D S24/resource/modules/python/libs/python39/c4d” c4d
PyCharm
See also
Add the previously installed Python Interpreter, see https://www.jetbrains.com/help/pycharm/configuring-local-python-interpreters.html.
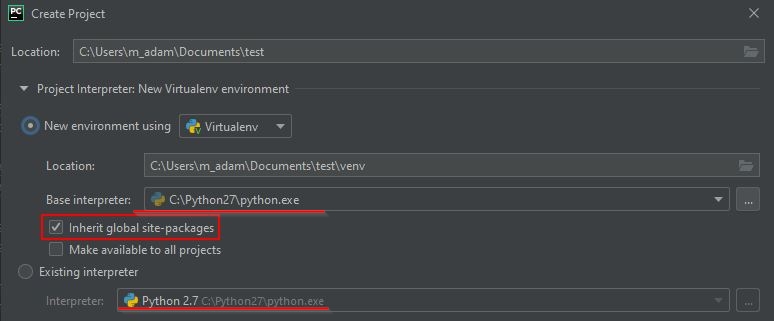
Create a new project, be sure the selected interpreter is the one you installed. If you decide to use virtualenv, check ‘Inherit global site-packages’.
Enjoy.
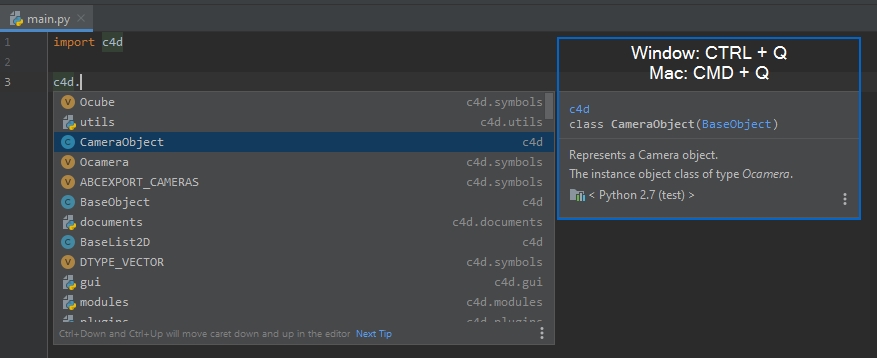
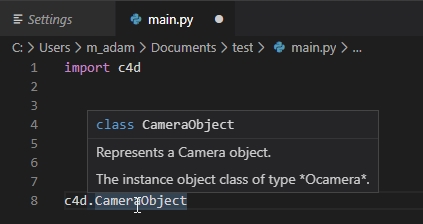
Visual Studio Code
See also
Install the Python extension for Visual Studio Code.
Select the File > Preferences > Settings command (or Ctrl + , or Cmd + , shortcut).
Search the settings for python.jedi and disable it.

Create a new file.
Defines its language in the bottom right.
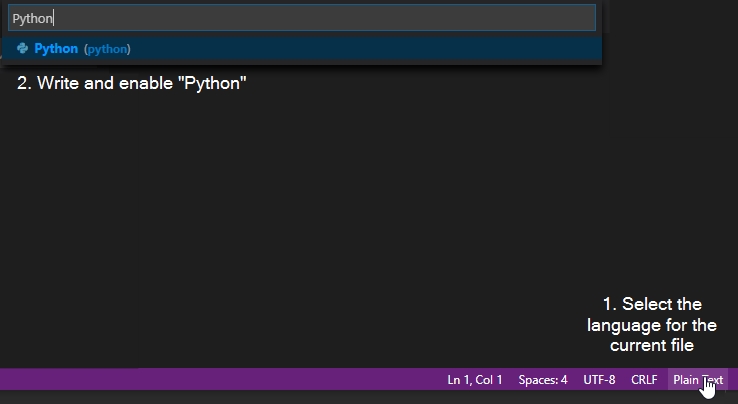
Defines the used interpreter in the bottom left.

Enjoy.