c4dpy
Warning
Table of Contents
Installation
Warning
c4dpy needs a valid installation of Cinema 4D it’s not a standalone.
Note
c4dpy should have the same version than the folder is in it.
R21+:
Since R21 c4dpy is part of the normal installation process so you don’t need to install anything.However due to the new licensing system, before any usage of it, launch it at least one time in order to license c4dpy otherwise you can pass these argument while executing c4dpy:
g_licenseUsername=”[username]”// inform Cinema 4D about the username to authenticate on https://id.maxon.net.
g_licensePassword=”[password]” // inform Cinema 4D about the password to authenticate on https://id.maxon.net.
R20:
Download the c4dpy version which match your Cinema 4D version.
Extract the c4dpy executable according to the target operating system.
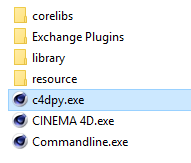
Copy the extracted c4dpy executable to the Cinema 4D installation directory along with the other executable files:
Verify Installation
Windows
Open Command Prompt.
Drag c4dpy.exe executable into the Command Prompt and press enter.
c4dpy should run without error and ask your MyMaxon account. Next start you will not need to login again.
Python interactive interpreter >>> is now available.
Mac
Open Terminal.
Right-click on c4dpy.app and select Show Package Contents.
Navigate to the Contents/MacOS directory.
Drag the c4dpy file into the Terminal window and press return.
c4dpy should run without error and ask your MyMaxon account. Next start you will not need to login again.
Python interactive interpreter >>> is now available.
#. Python interactive interpreter >>> is now available.
Command-Line
c4dpy runs a script with:
c4dpy script.py
The following command invokes script.py and passes arg argument:
c4dpy script.py -arg
Note
Arguments can be accessed by sys.argv.
The command below loads the module in file.py and passes arg argument:
c4dpy -m file.py -arg
c4dpy also executes Python code in a string:
c4dpy -c "print('Hello')"
Editor Integration
Since c4dpy is just a Python interpreter like any other, it can be integrated with the developing environment of your choice.
Sublime Text
This guide has been written for SublimeText 3.2.2, some of the described steps might be slightly different for future or past versions of the application.
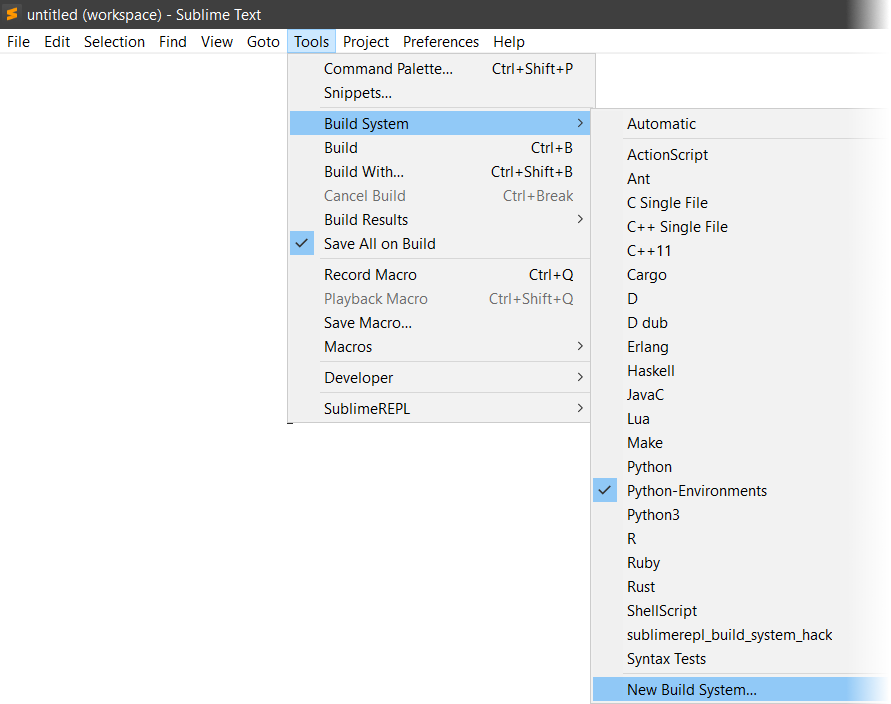
Run
Tools > Build Systems > New Build Systemfrom the main menu to create a new build system.
SublimeText will open a file for you, replace its content with the following:
1 2 3 4 5 6 7 8 9 10 11 12 13 14 15 16 | { "selector": "source.python", "cancel": {"kill": true}, "variants": [ { "name": "c4dpy", "cmd": ["c4dpy", "-u", "$file"], "file_regex": "^[ ]*File \"(...*?)\", line ([0-9]*)", }, { "name": "CPython", "cmd": ["py", "$file"], "file_regex": "^\\s*File \"(...*?)\", line ([0-9]*)" } ] } |
This example assumes a separate standalone CPython installation to be on the machine which we want to run alongside with c4dpy in this Python build environment. If this is not the case, one can delete the lines ten to fourteen in the file listing above. This example also assumes the user to having set up environment variables for both the CPython and c4dpy interpreter;
c4dpyfor c4dpy andpyfor CPython. Alternatively the firstcmdargument can also be an absolute path, e.g.:
1 2 3 4 5 6 7 | "cmd": ["c4dpy", "-u", "$file"], // Should become something like this, modify to your Cinema 4D directory. "cmd": ["C:\Program Files\Maxon\S24\c4dpy.exe", "-u", "$file"], "cmd": ["py", "$file"], // Should become something like this, modify to your CPython directory. "cmd": ["C:\compilers\python3.9\python.exe", "$file"], |
Save the file with
CTRL + S, SublimeText will open a file dialog already set to the user packages path. Save the build environment settings under the name it should appear in menus, e.g., Python-Environments.sublime-build.The build environment will now appear in the build menu to be selected as the active build environment as shown in the screen under point one.
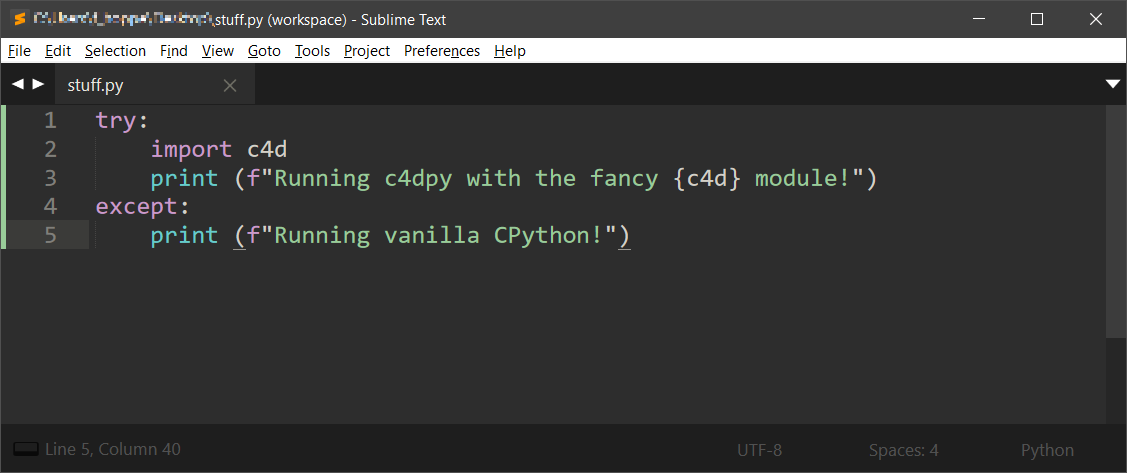
A Python file like shown below can now be run with either of the defined Python interpreters.
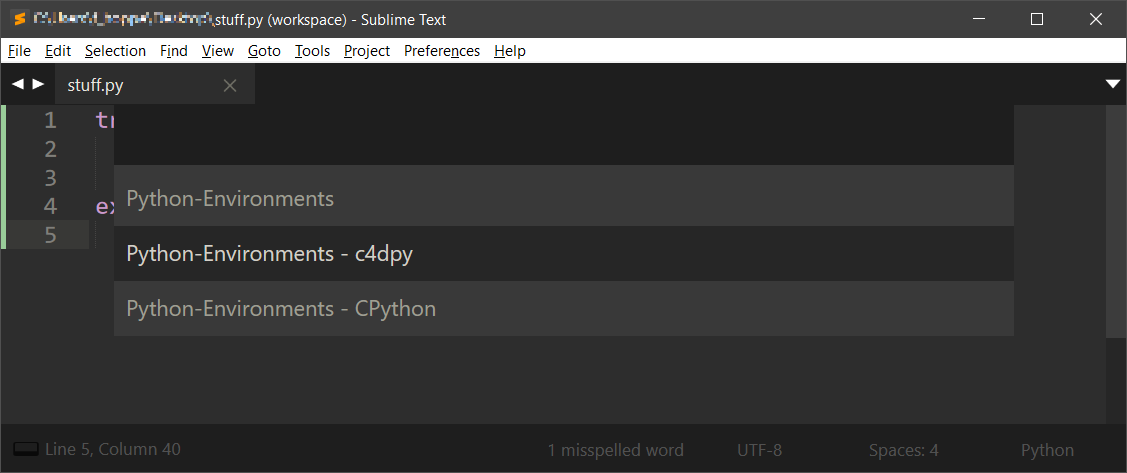
Pressing
CTRL + SHIFT + Bor runningTools > Build Withwill cause SublimeText to prompt a popup asking for the interpreter to run the file with.
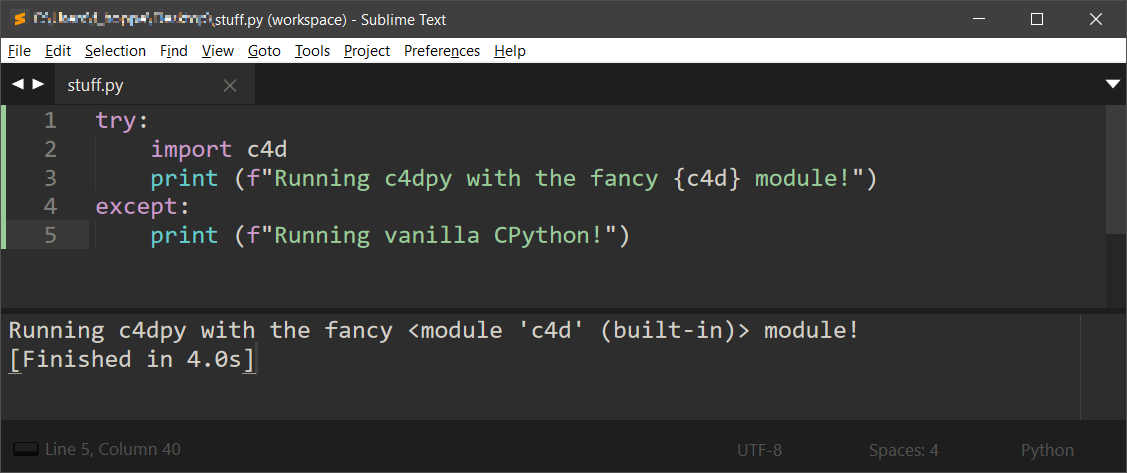
Running the file with c4dpy:
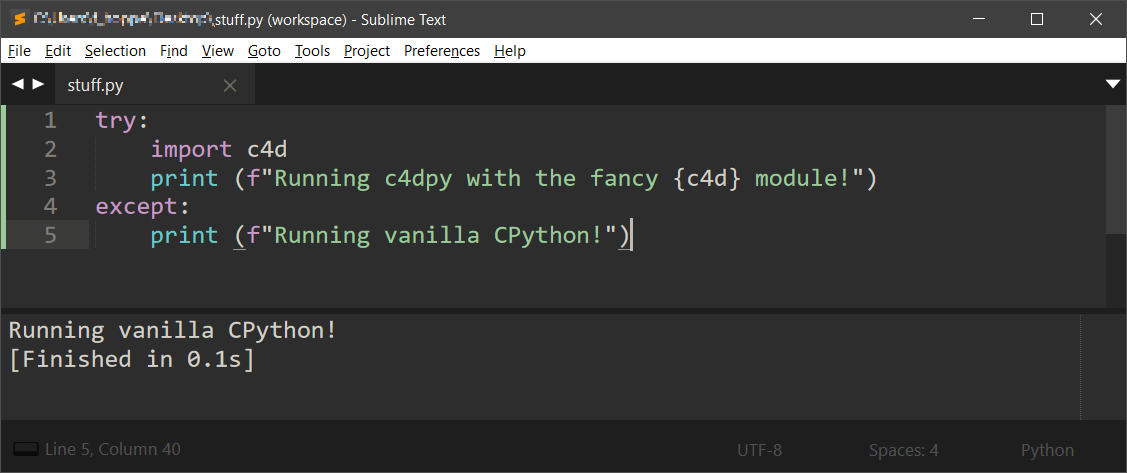
Running the file with CPython:
After having set the sub-environment with
CTRL + SHIFT + Ball consecutive Build invocations (CTRL + B) will run that currently selected sub-environment.
Visual Studio Code
c4dpy can also be run as a Python interpreter in Visual Studio Code.
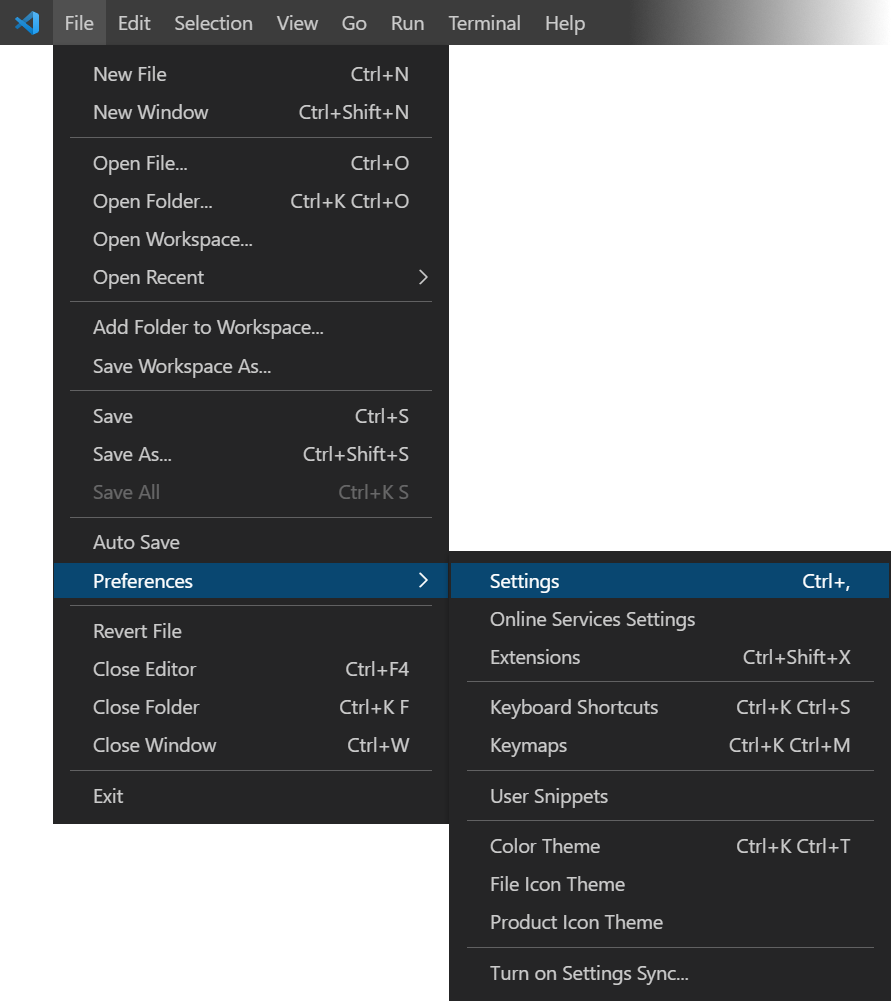
Open Visual Studio Code and run
File > Preferences > Settings
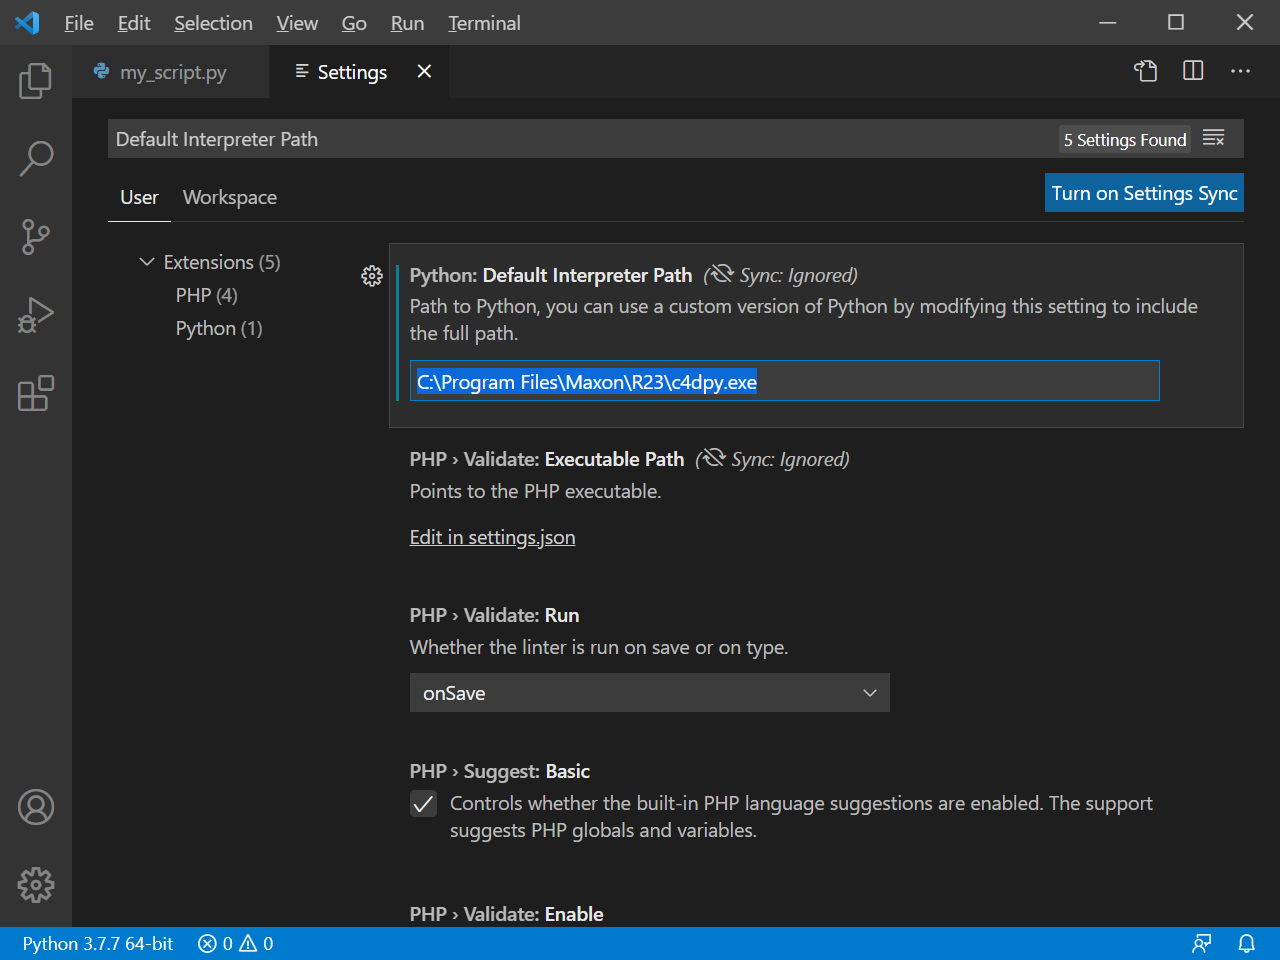
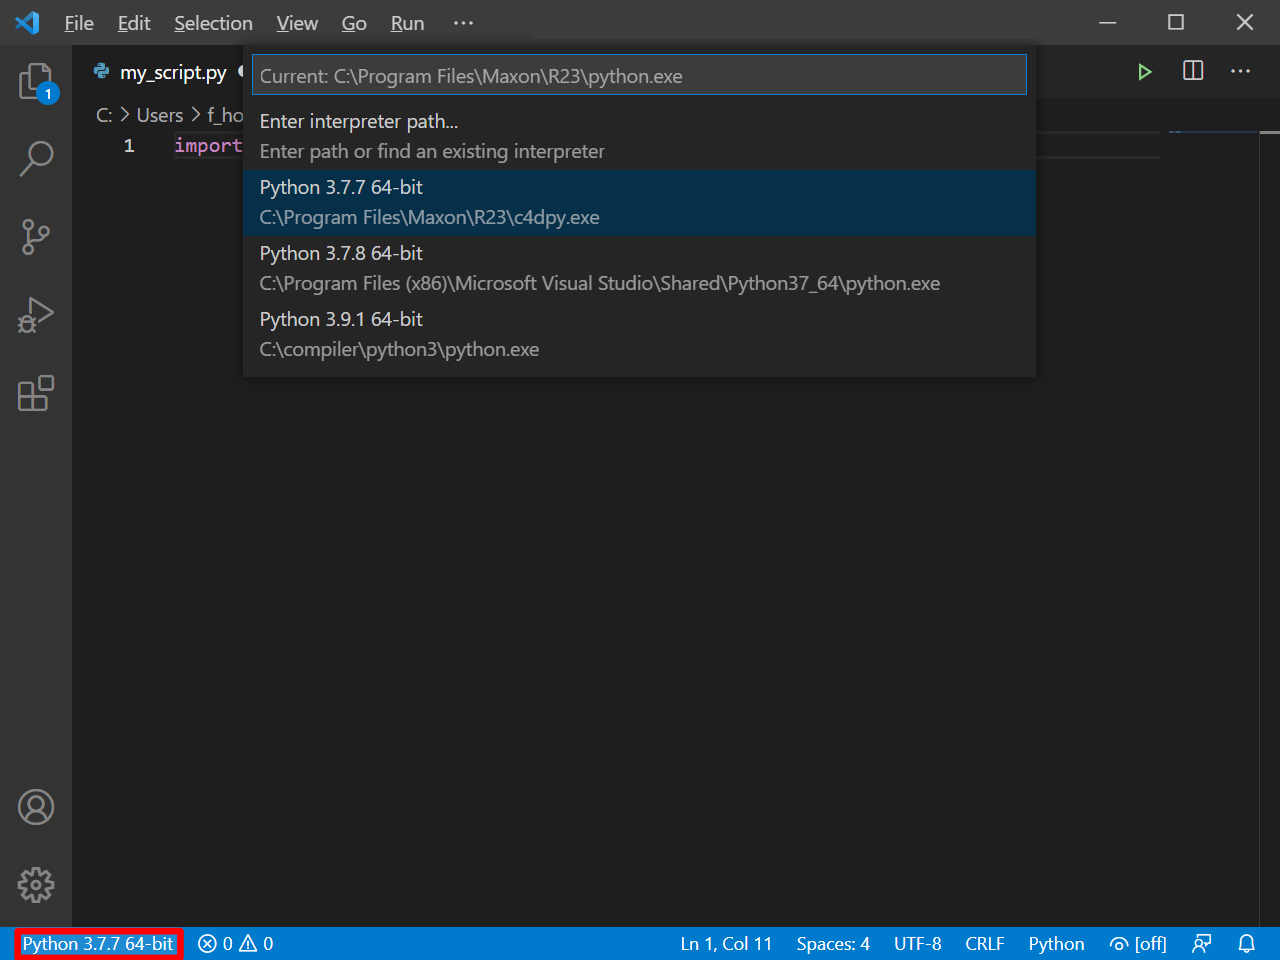
Type ‘Default Interpreter’ into the search bar of the user settings to find the ‘Python: Default Interpreter Path’ setting. Set it to the path of a c4dpy interpreter.
c4dpy should now appear in the available Python interpreters in the interpreter selector in the bottom left corner of Visual Studio Code when having a Python file opened.
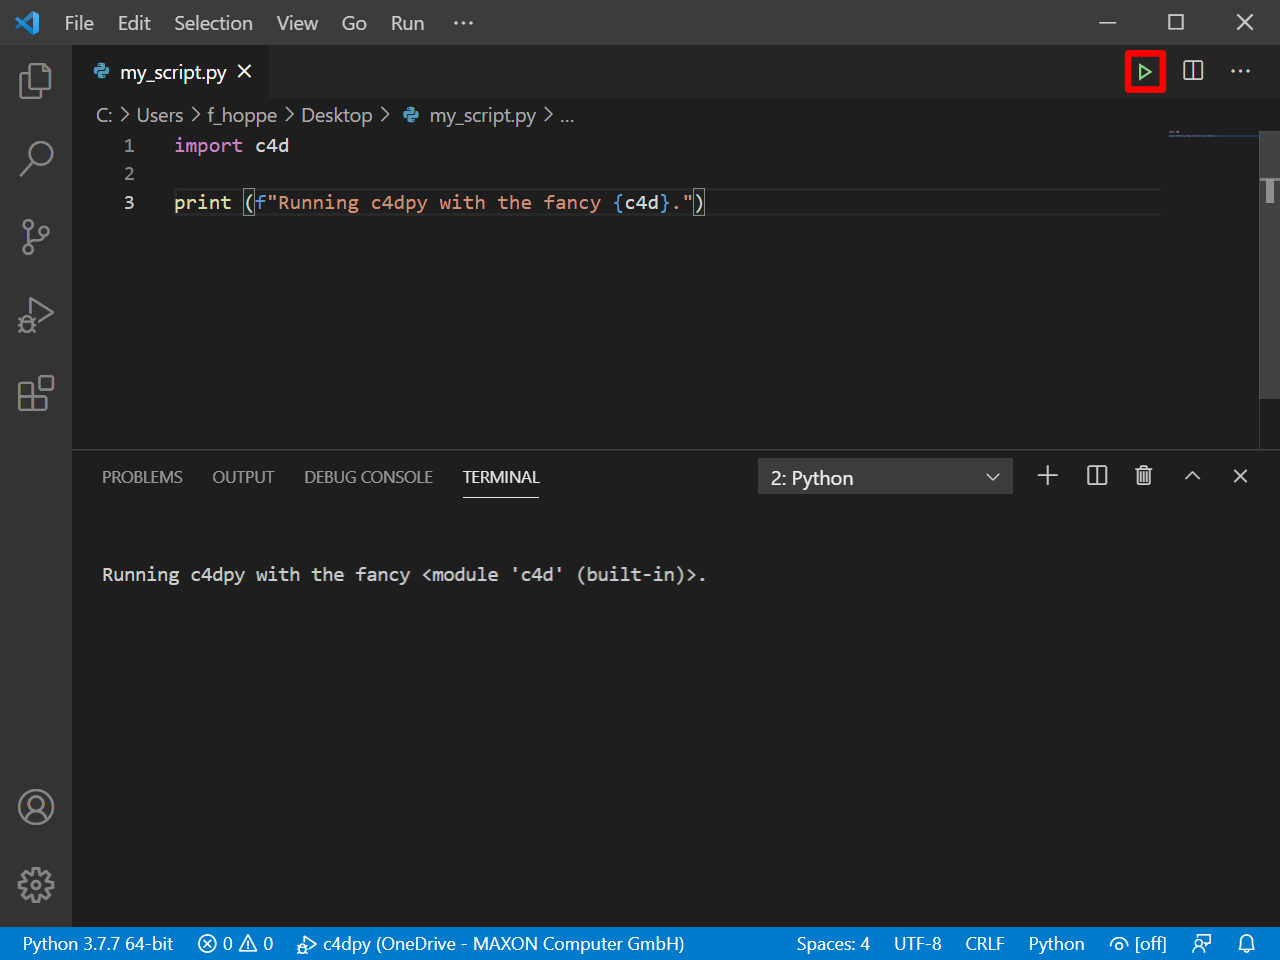
With it activated, a file can be interpreted either by pressing
CTRL + F5or by pressing debug play button in the top right corner.
Debugging (
F5) will not work out of the box.
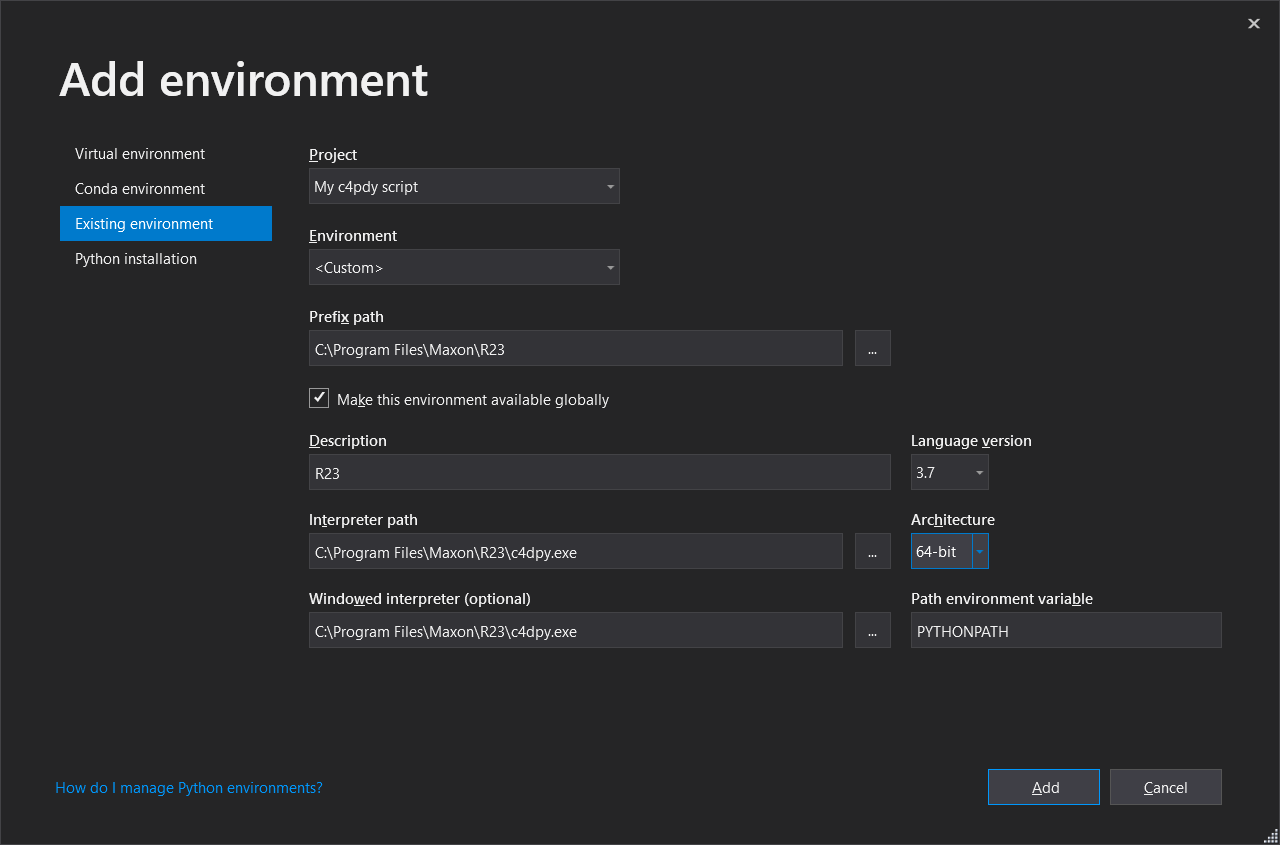
Visual Studio
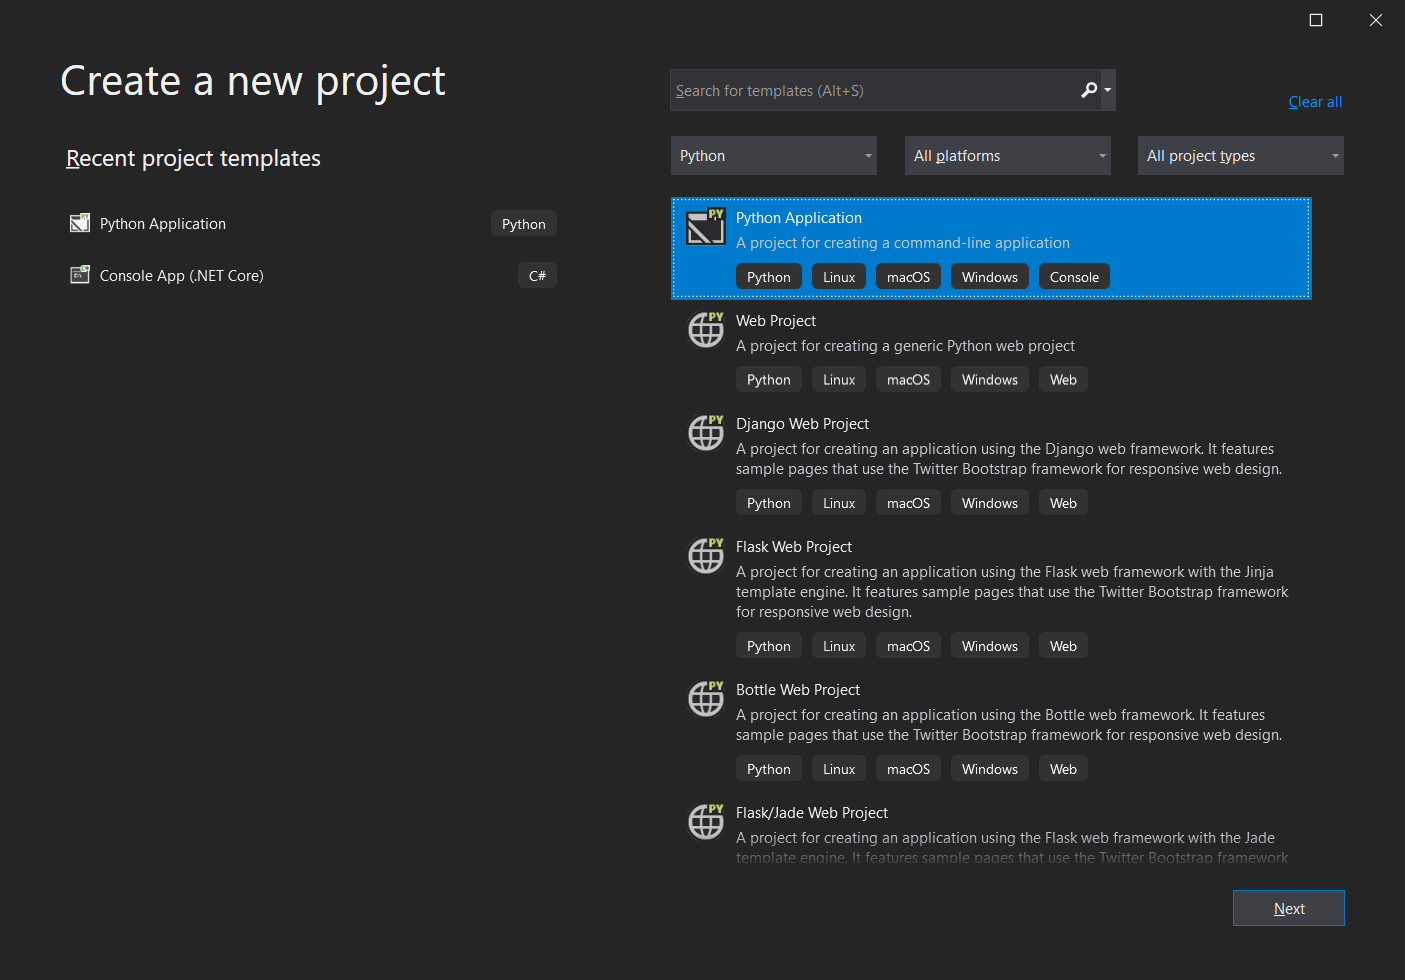
c4dpy has to be setup on a per project basis in Visual Studio.
Open Visual Studio and start a new Python Application project.
In the project add a new Python environment.
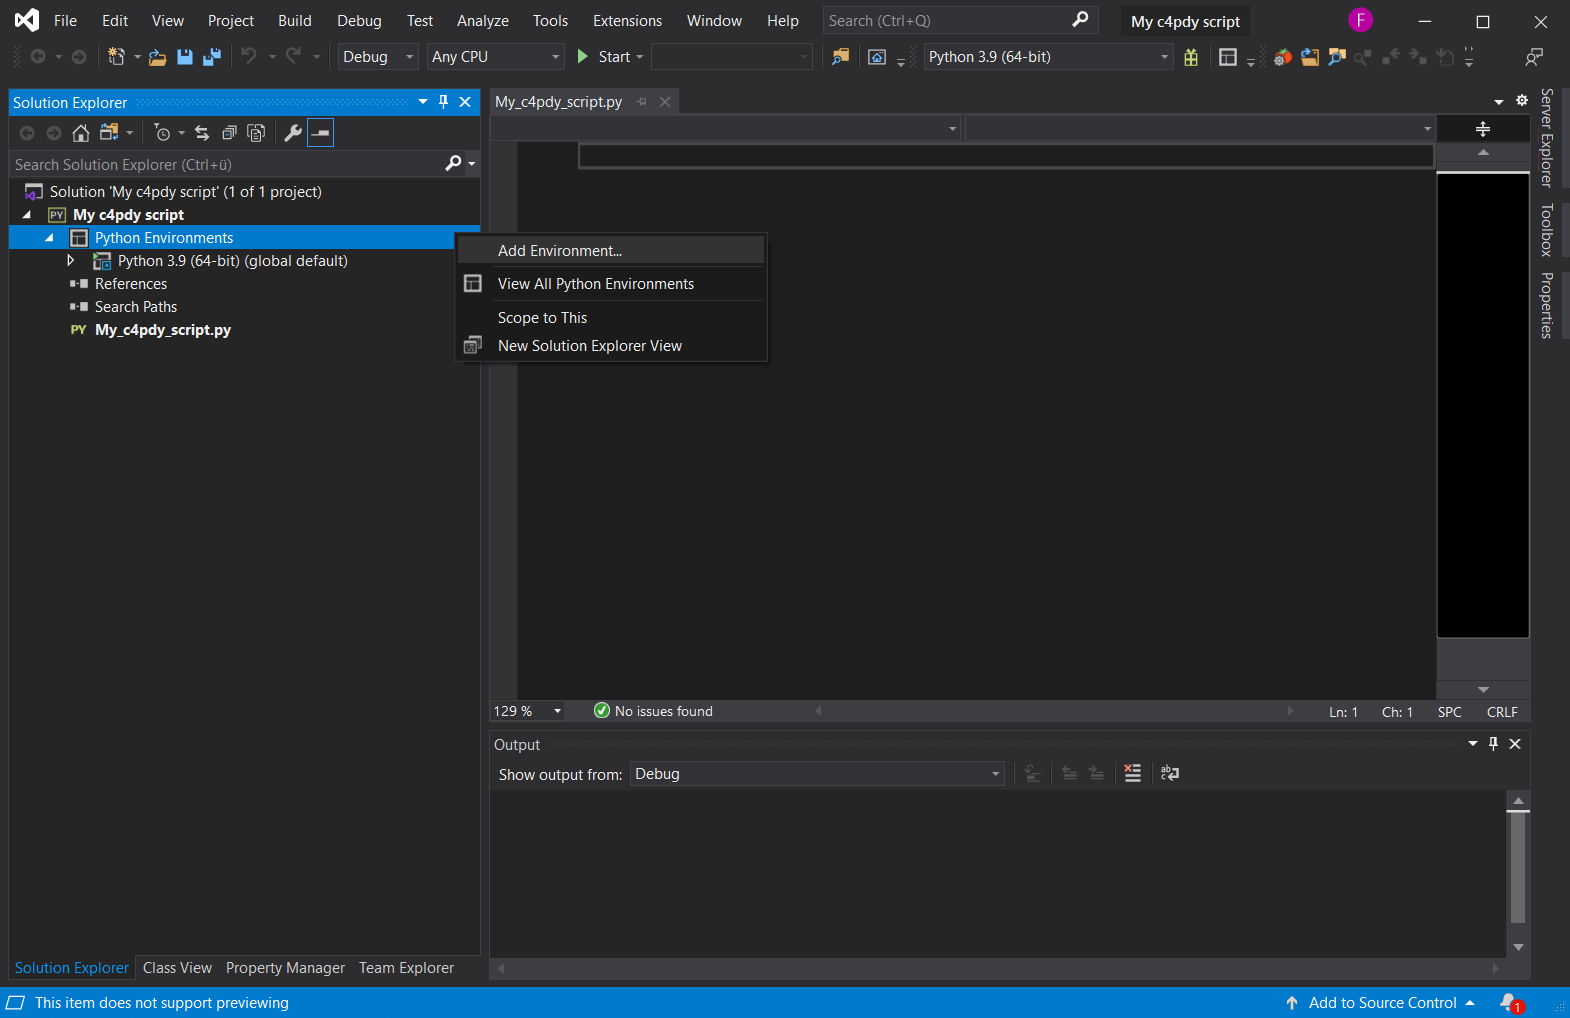
In the dialog select Existing Environment and then setup the values like shown below.
Pressing
CTRL + F5will now run the defined startup file of the project.
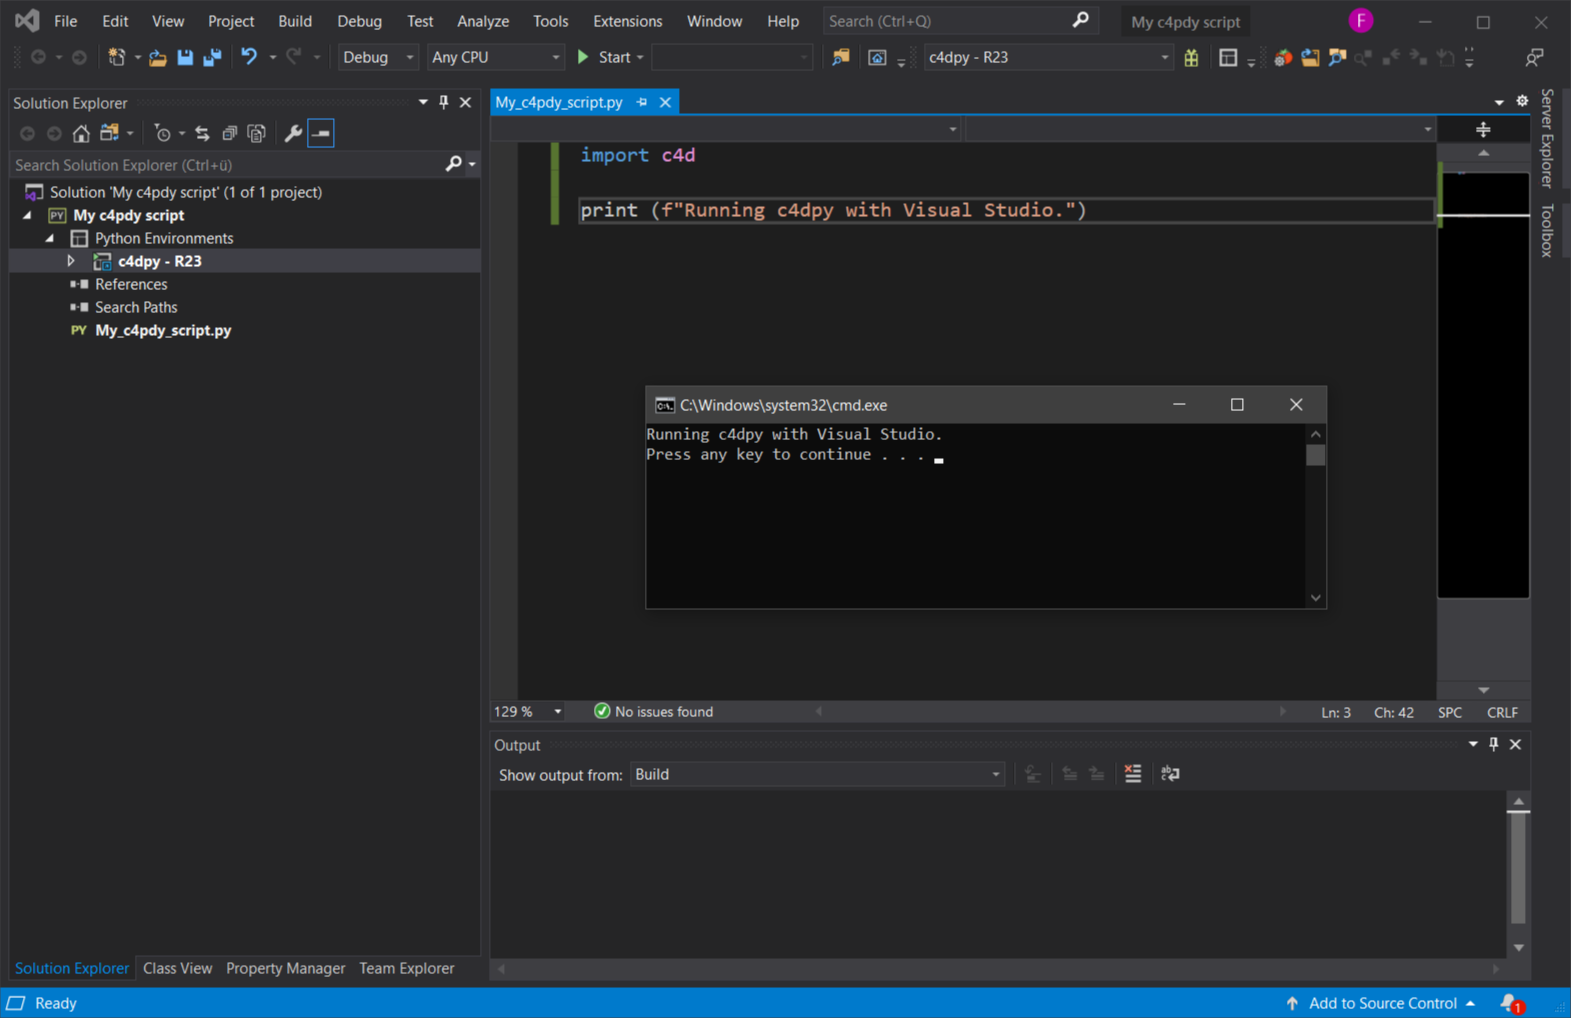
Debugging (
F5) will not work out of the box.